Canva is a powerful graphic design tool that’s easy to use, offers customizable templates, and is free to use to publish your live website. Using Canva for website design is possible within minutes without any programming knowledge, but to get the most out of the platform you’ll need to know what to do.
Cyphon Digital offers over 20 years of design experience to help you build an attractive website using Canva with a detailed step-by-step guide. With a combination of easy-to-understand steps and expert tips and tricks, you’ll have your own website up and running in no time.
Keep reading to learn more about using Canva website design tools, the step-by-step process to build a website using Canva, and some additional tips and tricks to help you get the most out of the website builder.
Why Use Canva for Website Design
There are lots of DIY website builders available including WordPress, Wix, Squarespace, and more, but there are some good reasons to choose Canva.
First, it’s extremely affordable with plenty of free templates, free domain website hosting, and more. Even if you want to use Canva Pro to access more design elements, templates, graphics, images, audio, and other tools and hosting options, you’ll only pay $12.99 per month or $119.99 per year.
Another reason why you should be using Canva for website design is that it’s super easy to use without any programming prior design or digital marketing experience. This makes it exceptionally easy for small business owners to create an effective website. They provide a drag-and-drop editor, and the user interface makes it easy to navigate different pages and sections.
While it’s stripped down compared to more complex website builders, the one-page website functionality, and easy editor layout means you won’t have to worry about technical requirements either. You’ll simply choose from a massive library of website templates and start editing your messaging and design elements within the editor using the steps below.
Using Canva for Website Design (Step-by-Step Process)
Follow this easy tutorial to create your homepage or landing page using Canva design capabilities.
Step 1: Create a Canva Account
It’s easy to create a free Canva account. Go to Canva.com and click the purple “Sign Up” button in the top right corner. You can choose to connect to your Google, Facebook, Microsoft, Apple, or Clever account or continue with your email address.
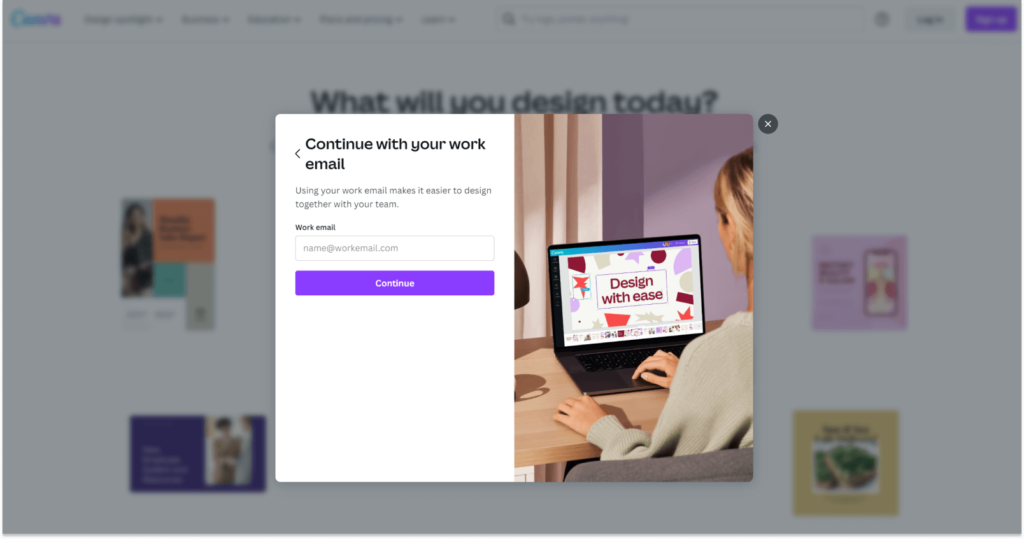
As soon as you sign-up and sign-in, you’ll be directed to the user interface where you’ll receive tutorial tips and access to templates, tools, and more. You can also start a free Canva Pro trial for 30 days if you choose.
Step 2: Select a Website Template
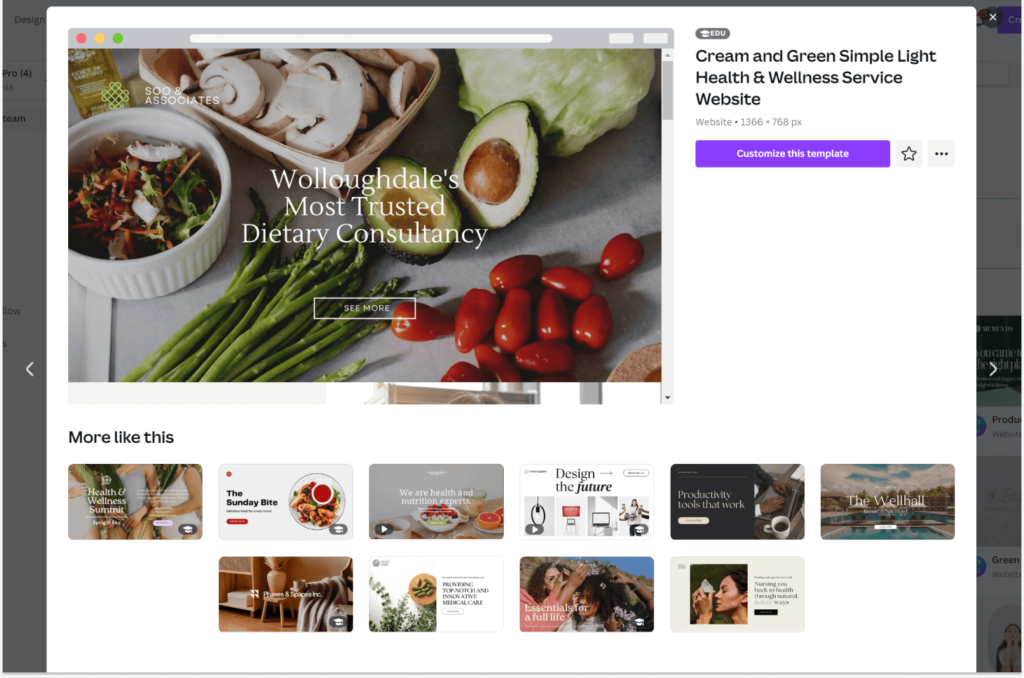
Next, you’ll choose the webpage template out of the 1000s that Canva offers. Choosing a template offers a basic guideline that you’ll follow while constructing your website.
From the Canva home screen, you’ll click “Websites” and choose from the type of website you wish to create. This will take you to the creation screen where you’ll be able to choose from the long lists of templates. When you click on each one, you’ll see what it will look like.
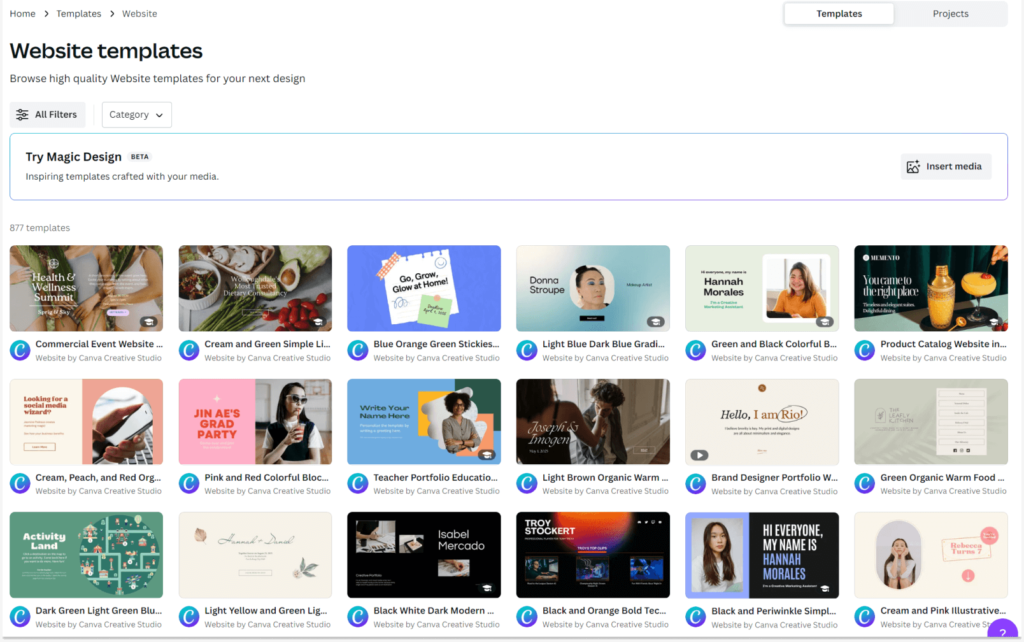
Some themes will only have a single page while others can create several “pages” of the website. If you choose a template that has multiple pages, you can click “Apply All X Pages” to use them all. You’ll see that it adds them on top of one another because Canva uses a single-page website builder. You’ll be able to add anchor links later on in the process.
You can mix and match templates if you want as well. To do this, you’ll add as many pages as you wish by clicking the “+ Add Page” feature on Canva. This will allow you to select the different pages of the same template or mix and match themes to create a 100% custom website.
Step 3: Customize the Template
The Canva website template will be too generic for your customized website design, so now it’s time to make it your own. You will be able to customize all aspects of the template.
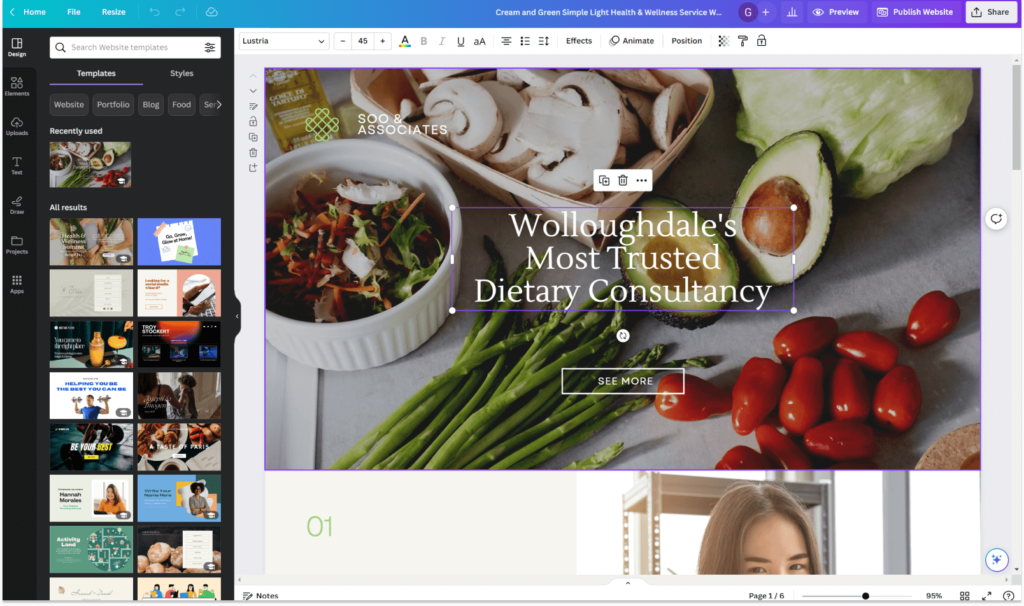
Use the color changes, transparency setting, positioning, and photo editing tools to customize the template to fit your ecommerce brand kit.
If you don’t want to mess with the colors too much, but want to change it to something closer to your brand colors, then click “Design” (where the Canva templates are located) and then “Styles” where you’ll be able to choose from a wide variety of font and color palette combinations.
You can also use the “Flip” feature to flip the background images horizontally or vertically. Additionally, you can reposition all the elements like headlines, CTA buttons, images, and more. Once you have the colors and template design how you want it, you can move on to customizing the individual elements and adding more.
Step 4: Add and Customize Elements
There are tons of elements you can add and edit on your website template using the “Elements” tab on the left-hand side. This includes lines and shapes, buttons, graphics, stickers, photos, videos, charts, tables, images, and more.
When you find an element you like, click it and it will show up in the editor. Then, you can drag the corners to resize. Then, click and drag it to move it where you want to place it on your website design. There are also social media logos that you can add and link to your social accounts. To link any image to a website, right click and then click “Link”
You can also add and edit text boxes by clicking the “Text” tab on the left-hand side. Make sure that you use copywriting best practices by adding benefits, SEO, trust elements, and features to your messaging.
This is also where you’ll choose a font that matches your brand, website template, and messaging. We recommend sticking to one or two fonts throughout the whole website to create a cohesive brand identity.
Finally, you can use the “Uploads” tab to add your own images or videos to your website. That means you can add your own logos, animations, bio pictures, product images, testimonial images, and more.
If you’ve added elements like images or graphics that don’t seem to mesh with the color scheme, you can right click them and click “Apply Colors to Page” to blend the page and image colors for a cleaner transition.
Step 5: Add Navigation
Even though the Canva design platform uses a single-page website design, you can add links to take visitors to different parts of the page.
To do so, you’ll need to add a page title to your section. To add a page title, you can click the little pencil and paper icon at the top left of the template page. Then, add the page title and any additional notes about the page. Once you’ve titled all the different pages, they’ll appear as links at the top of your page on the navigation search bar.
Step 6: Preview and Adjust the Design
After you have all the elements, text changes, pages, and other steps completed, it’s time to preview and make the finishing touches. Sometimes it looks a little different in the editor and on the published website. To preview your website and see how it looks when it goes live, click the “Preview” button at the top of the page.
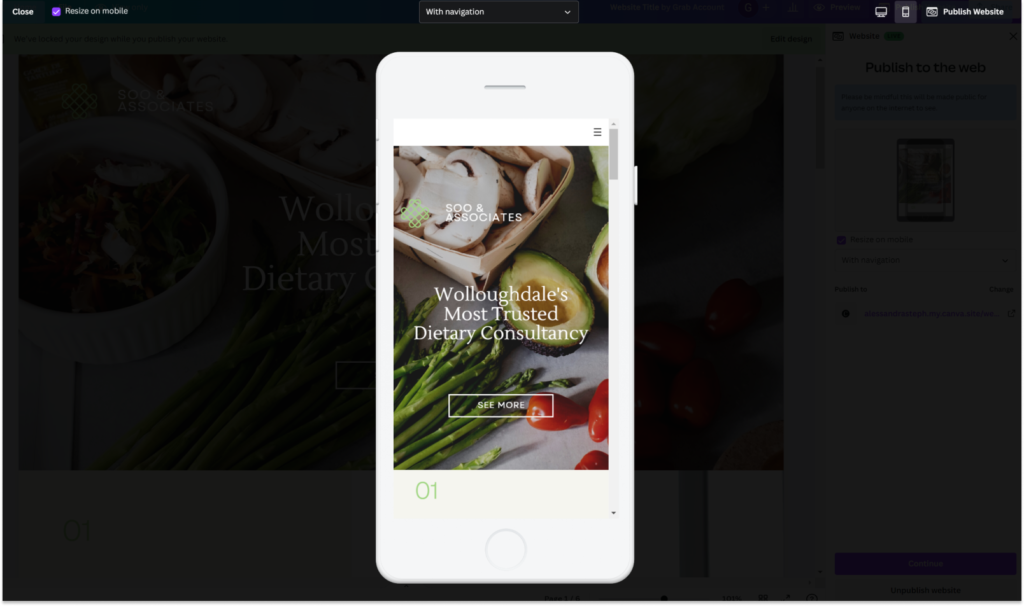
You can also change from desktop preview to mobile preview by clicking the cell phone icon at the top. This will allow you to ensure that you have a mobile responsive website. If your website design doesn’t seem correct on mobile, you might have to resize and group components in the Canva editor.
To do so, hold down the Shift key while clicking the components you want to group. Then, right click and select Group from the dropdown. This will make them appear as a cohesive unit and can help them stay together on mobile instead of stacking on top of each other.
After you preview your website and decide that it looks right, you can move on to step 7. You’re also able to embed your design on Medium, WordPress, or your own website or share it with your team. You can even print or download your design! All these features are available using the “Share” button at the top right corner of the Canva interface.
Step 7: Publish the Design as a Website
Now that you’ve completed your free website design, it’s time to publish it. When you click the “Publish” button at the top of the page, you’ll be asked to publish it to a Free Domain, purchase a domain, or use an existing domain name.
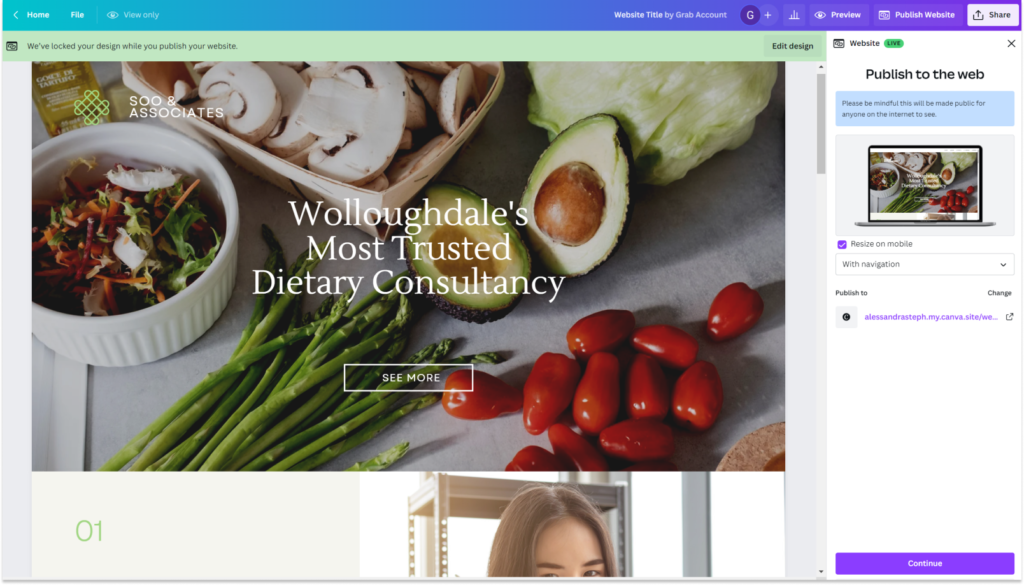
Using an existing domain or purchasing one gives your website a more recognizable web address that might make it easier for customers to find. However, Canva free domains are easy to use and perfect for beginners. You can always switch to another domain later.
When you click “Free domain” you’ll be able to enter a subdomain. This will appear as part of your domain before my.canva.site. For example, if you choose “MyServices” for the subdomain, your full domain will appear as myservices.my.canva.site.
After this, you’ll see a preview of your browser tab, be able to add a description, change permissions, or even hide your website from search engines if you wish. Click publish and your website will go live!
Bonus: Tips and Tricks for Using Canva on Website Design
Here are some additional tips and tricks that you can follow when using Canva for website design. Start creating a professional, attractive, and 100% unique website design.
Keep It Simple
With so many options, possibilities, and free tools, it’s easy to start adding tons of cool graphics, colors, and more. However, try not to go overboard. Keeping it simple makes it easier for your customers to find what they are looking for. You want to make the experience as good as possible and doing too much can impede navigation.
Don’t Limit Yourself to Canva’s Images
While Canva offers plenty of animations, graphics, icons, and images, don’t be afraid to look elsewhere to find certain elements that meet your needs. Places like Pexels. Pixabay, or Unsplash offer free, royalty free images that you can use on your website.
Use Keyboard Shortcuts
While using Canva for website design is one of the easiest way to stage your website, you may get frustrated if you keep having to do the same things over and over again. Use the following shortcuts to make your web design process easier:
- Open font menu: Shift?F
- Find and Replace: ?F
- Undo: Ctrl + Z
- Redo: Ctrl + Y
- Select All: Ctrl + A
- Add text: T
- Add link: Ctrl + K
- Add empty page: Ctrl + Enter
Conclusion
Canva is a great, and free, tool that allows you to create and publish a website for your business. With 1000s of templates, easy drag-and-drop editor, and the ability to customize with endless possibilities, it’s a great choice for anyone looking to build their first website.
Try using Canva for website design by following our steps to sign up, choose a template, customize and add elements, and preview and publish your website. However, if you need help creating a professional website that’s designed with digital marketing in mind, Cyphon Digital’s team of experts can help.
FAQs
Can I add a shopping cart to my Canva website?
No, there is no shopping cart element to add to your Canva website. If you need a shopping cart, then you might want to choose a different website builder.
Can I use Canva designs on my website?
Yes, you can use Canva designs on your website, but for some templates there may be copyright restrictions. If this is the case with the template you choose, you may be required to purchase a license.
Additionally, there are limitations to selling Canva templates and designs, so if that’s your plan you need to check Canva’s licensing information.
How many websites can I design for free?
You can publish 5 websites for free using the free domain service. Canva Pro offers unlimited website publishing.
What other designs can I create with Canva?
In addition to websites, you can create print products, landing pages, social media content marketing posts, presentations, and more with Canva.
Should I use a professional graphic or web designer or Canva?
It depends on your needs, budget, and goals. While Canva offers fantastic free services, you’ll be somewhat limited to their designs, particularly with only single-page websites available. A professional designer will be able to create an entire website that matches your brand, values, target audience, and more.
Cyphon Digital’s web design specialty can help you create a professional, attractive, and responsive website for your business. That way, you get a website that targets your audience, ensures a positive experience, and helps you grow and scale your revenue.
